A lot of my work involves the process of photo etching. Many jewelry artists use photo etching to incorporate images and textures into their work. Here's the process I use:
Generating an Image to Etch
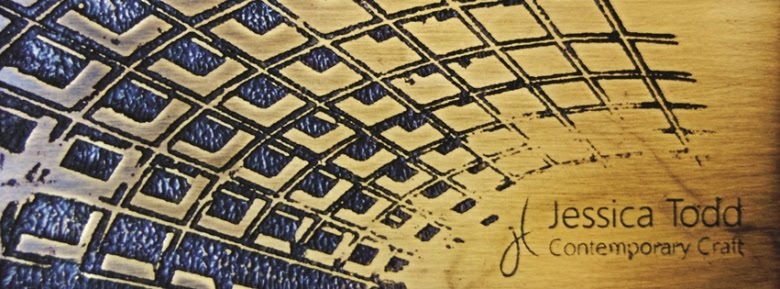
Step One: I select a photograph taken by me. I especially like to use travel photography. This is a photo I took of Michaelangelo’s dome in the Vatican.

Step Two: I convert the image to grayscale.

Step Three: I carefully adjust the image in Photoshop to create a black-and-white-only image. No gray can be present.

Step Four: The image is then saved as a bitmap file, which only allows for black pixels on a blank background. Sometimes I invert the image for a better etch.

Etching the Image into the Metal
Step One: The bitmap image is printed off.


Generating an Image to Etch
Step One: I select a photograph taken by me. I especially like to use travel photography. This is a photo I took of Michaelangelo’s dome in the Vatican.

Step Two: I convert the image to grayscale.

Step Three: I carefully adjust the image in Photoshop to create a black-and-white-only image. No gray can be present.

Step Four: The image is then saved as a bitmap file, which only allows for black pixels on a blank background. Sometimes I invert the image for a better etch.

Etching the Image into the Metal
Step One: The bitmap image is printed off.

Step Two: The image is photocopied onto a special paper called Press-n-Peel, or PnP, that can be transferred onto metal. It is commonly used to create circuit boards.

Step Three: The PnP is burnished onto the metal using heat to release the emulsion.

Step Four: The emulsion that has been burnished onto the metal acts as a resist. The metal is then placed into an acid bath that eats away any exposed metal.

Step Five: The final piece is fabricated using the etched metal.
